Use Github Actions to automate Hugo blog deployment
Intro
Recently I started learning the GitHub Actions, a feature provided by GitHub that can be used to automate a series of steps. In the process of software development, the most common use of this feature may be the building process. For static-typed programming languages such as C/C++, we are usually required to write the build scripts. The build process involves environment preparation, dependencies download, and build execution. However, automating software builds with GitHub Actions is not the focus of this post. As I was learning this feature, I thought about how I could put it into practice and realized I could use it to automate the build and deployment of my Hugo blog :)
Background
My Hugo blog uses two Git repositories
- Public repository: martinlwx.github.io - contains the generated static website.
- Private repository - Contains the configurations of the Hugo blog and the original posts in Markdown format. In the root folder, there is a
./publicsubfolder that points to the aforementioned public repo (as a git submodule).
The relationship can be illustrated in the following figure:
flowchart LR
  private("Private repo") -->|git push| public("Public repo: martinlwx.github.io")
If you don’t use Algolia, you don’t need to upload index.json
The process of publishing a post involves writing the post, generating the static website using Hugo, and uploading index.json file using atomic-algolia to Algolia. To simplify this process, I wrote a shell script.
#!/bin/bash

echo "Deploying hugo website..."
# delete all the files in public folder
rm -rf public/*

# build the website
hugo -t DoIt

# upload index.json
node push_algolia_json.js

# deploy the website
msg="rebuild site on $(date)"
echo "$msg"
cd public || exit
git add .
git commit -m  "$msg"
git push

# backup private repo
cd .. || exit
git add .
git commit -m "backup hugo on $(date)"
git push

echo "Git push successfully!"
Then, I can build and deploy my Hugo blog with one single command
$ bash deploy.shThe concepts in GitHub Actions
There are many concepts in GitHub Actions, such as Workflow, Event, Job, Action, and Step.
A Workflow can contain one or more Jobs, and each Job consists of multiple Steps. Each Step can run shell commands, execute shell scripts, or run actions. Here, actions can be regarded as pre-written scripts by others, typically used for complex and repetitive operations. By reusing others’ actions, we significantly reduce the effort required to write Workflows.
Workflows are usually triggered by pre-set Events, which include git-related events like git push, receiving pull requests, etc. Once triggered, the workflow will start running. The diagram below illustrates this process.
timeline
   Event: push
        : pull request
        : ...
   Job1 : Step 1. Run action
        : Step 2. Run action
        : Step 3. Run action
        : Step 4. Run action
        : ...
   Job2: Step 1. Run action
       : Step 2. Run action
       : Step 3. Run action
       : Step 4. Run action
       : ...
The workflow can be described as a YAML file, which will be managed with other files in our git repo. The detailed syntax can be found on this official page
Writing a YAML file
I assume that you have a basic understanding of GitHub Actions syntax, as this is not the focus of this article :)
Now, I will try to convert the aforementioned shell script into a YAML file (named build_and_deploy.yaml)
name: hugo-deploy
on:
  push:
    branches:
      - master

jobs:
  build-and-deploy:
    runs-on: ubuntu-latest
    steps:
      - name: Check out this repo
        uses: actions/checkout@v4
        with:
          submodules: 'recursive'
          fetch-depth: 0
      - name: Install Hugo CLI
        uses: peaceiris/actions-hugo@v3
        with:
          hugo-version: 'latest'
          extended: true
      - name: Install node.js
        uses: actions/setup-node@v4
        with:
          node-version: 'latest'
      - name: Install atomic-algolia
        run: npm install atomic-algolia
      - name: Build the website with the DoIt theme
        run: hugo -t DoIt
      - name: Upload index.json for search
        run: node push_algolia_json.js
      - name: Deploy
        uses: peaceiris/actions-gh-pages@v4
        with:
          deploy_key: ${{ secrets.HUGO_PRIVATE_KEY }}
          external_repository: Martinlwx/martinlwx.github.io
          publish_branch: main
          publish_dir: ./public
The actions/checkout action can be used to clone our git repository and its submodules. In my private repo, I have 2 git repositories:
We need to clone the git submodules recursively, which is why we use the submodules: true setting. Additionally, the fetch-depth: 0 setting ensures that all commits are cloned during the process.
The next step is installing Hugo itself. Although the official Hugo document provides a detailed implementation, I found it somewhat cumbersome. So I did some research and found actions-hugo, which can download Hugo for us and is easy to use. I set hugo-version: 'latest' to ensure it always uses the latest Hugo. Since DoIt use features like admonition, we also need to set extended: true, which means using the extended version of Hugo.
If you don’t use Algolia, you don’t need to install node.js, install atomic-algolia, and upload index.json
The installation of node.js is similar. We can just leverage the actions written by others.
After installing node.js, we can use npm to install atomic-algolia
Before uploading the index.json file, we need to ensure that the index.json is up-to-date. So, we run hugo -t DoIt first
Now we can run node push_algolia_json.js. If you are curious about how to write push_algolia_json.js, you can check atomic-algolia
Finally, we come to the most complex part - deploying the Hugo Blog. The author of actions-hugo also offers another action called actions-gh-pages to simplify the deployment. However, the complexity arises from the repositories themselves. As mentioned earlier, I have 2 repositories. I first build the Hugo Blog in the private repository and then deploy it to the public repository. According to the README.md in actions-gh-pages, we need to set the external_repository attribute, which points to the public repository. Because this action involves two repositories, we also need to set deploy_key, which means we need to generate a paired ssh-key. The following diagram illustrates this idea.
flowchart LR
  private("`
  Private repo
  (use the *private* ssh-key as a *secret*)
  `") -->|peaceiris/actions-gh-pages@v4| public("`
  Public repo
  (use the *public* ssh-key as a *deploy key*)
  `")
First, let’s generate paired ssh-key by the following command
# replace with your email here.
$ ssh-keygen -t ed25519 -C martinlwx@163.com -f "hugo"
In the current directory, you will see there are hugo and hugo.pub files
- Open the public repository, click
Settings -> Deploy keys -> Add deploey key, and copy and paste the content ofhugo.pub. Note that you should enableAllow Write Access. - Open the private repository, click
Settings -> Secrets and variables -> Actions -> Manage repository secret, and copy and paste the content ofhugo. Remember the title you set because we will need to reference it in the${{ secrets.xxx }}. I set the title toHUGO_PRIVATE_KEY, so I can use${{ secrets.HUGO_PRIVATE_KEY }}in thedeploy_key.
The remaining configurations I did not explain:
publish_branch: main, thepublish_branchdepends on the branch you are deploying in your public repository. In my case, I set it to themainbranch.publish_dir: ./public, thepublish_diris where you generate your static Hugo website in your private repository. In my case, thehugo -t DoItcommand will generate the static Hugo website into the./publicfolder.
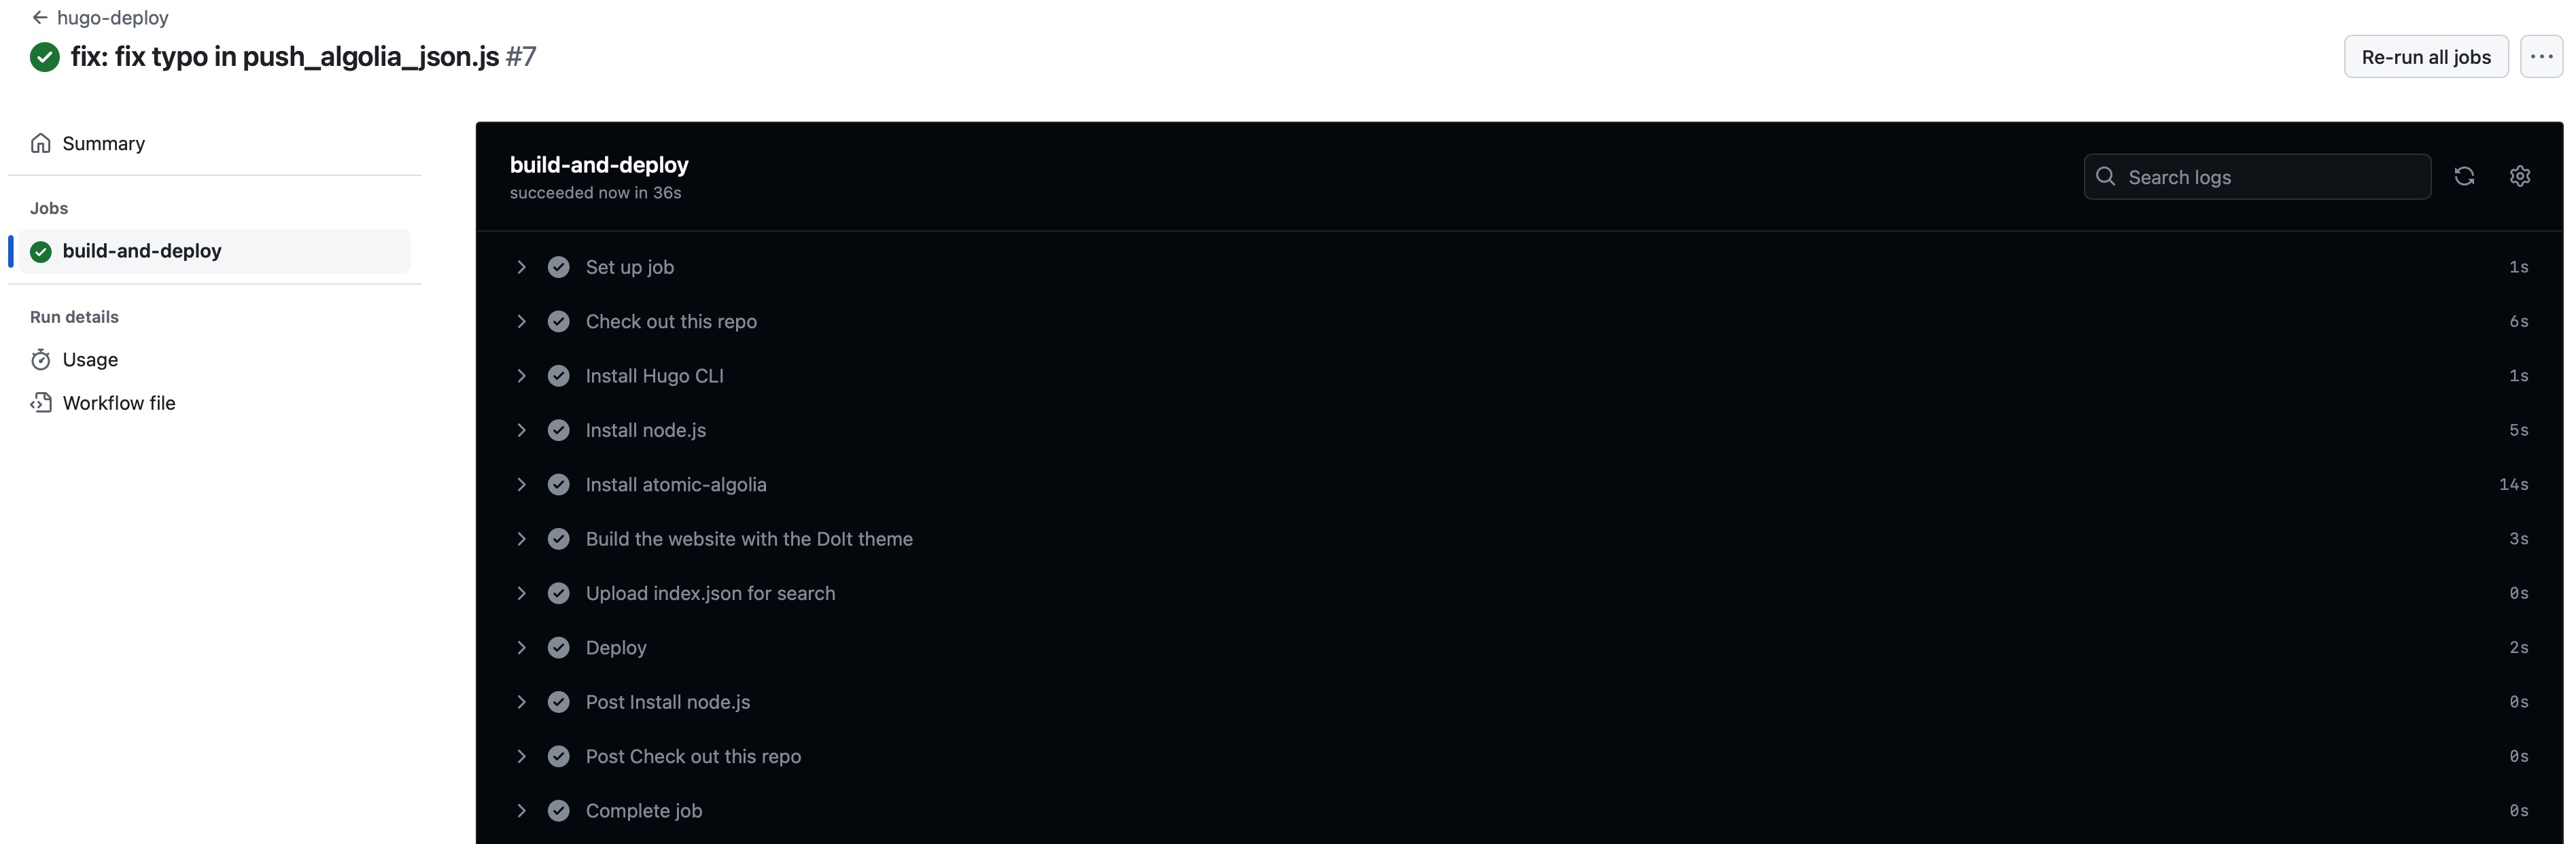
Finally, we have completed the YAML file we need. The next step is to put it into the .github/workflows directory and save this YAML file. After you commit this change, you should see the GitHub Actions is now working (Open the Actions tab on your private repository)
Wrap-up
After setting up the pipeline, I realized my workload seemed to have increased. What used to be done with just bash deploy.sh now requires me to manually git add and git commit—though this is partly because the previous commit messages were generated by a command. Nonetheless, I’ve learned how to use GitHub Actions, and automating the deployment of my Hugo blog has been an interesting CI/CD practice. I hope this article helps you, the reader, in some way :)